

Objectives:
- Google Cloud VPC Network Peering
- Create Nginix Server on one VM and access from another
- SSH to VM from local PC using Public IP of VM
Google Cloud VPC Network Peering
Google Cloud VPC Network Peering connects two Virtual Private Cloud (VPC) networks so that resources in each network can communicate with each other. In this post we will create two VMs in Google Cloud with two subnets, make VPC network peering between them and perform ping reachability checking.
In today’s fast-paced digital landscape, creating a Virtual Private Cloud (VPC) network on Google Cloud has become a crucial step in ensuring a secure and scalable infrastructure. In this blog post, we will guide you through the step-by-step process of setting up a VPC network peering between two VM located separate geographical location using Google Cloud Playground.
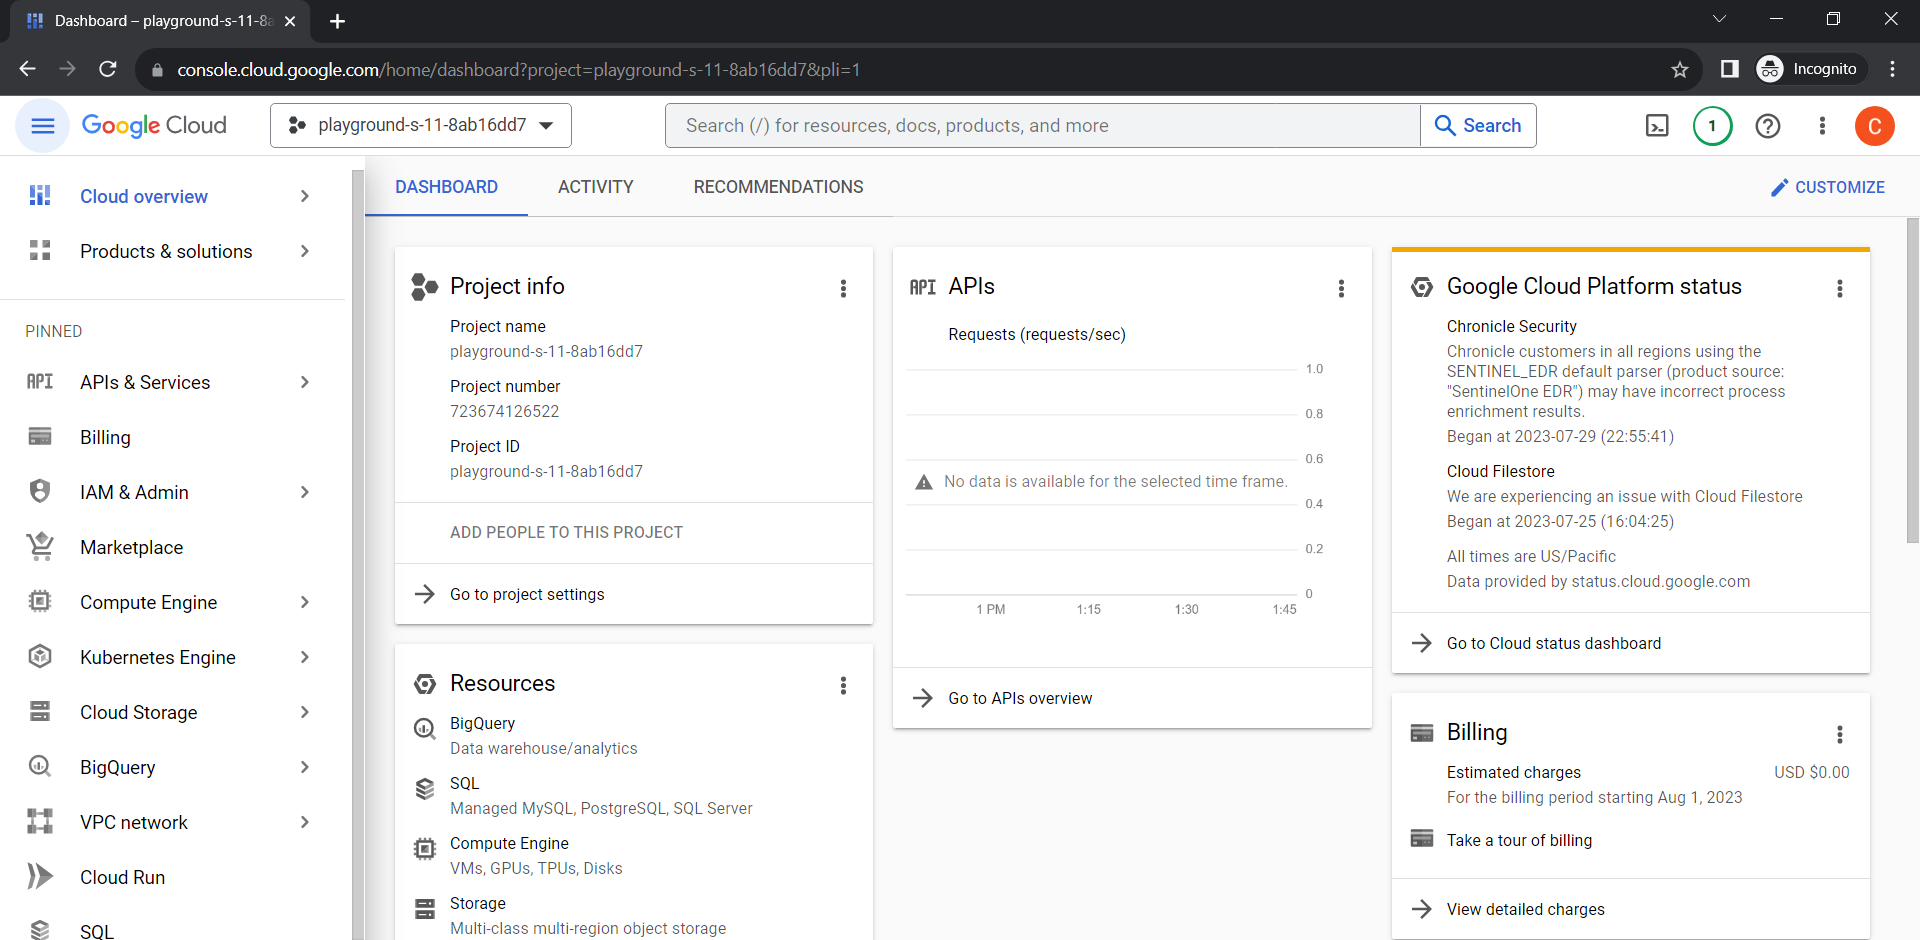
Before we proceed, make sure you can access Google Cloud Playground, a user-friendly platform that simplifies cloud resource management. Once you’ve successfully logged in, we can promptly proceed with setting up a VPC network, which will enable us to create virtual machines.
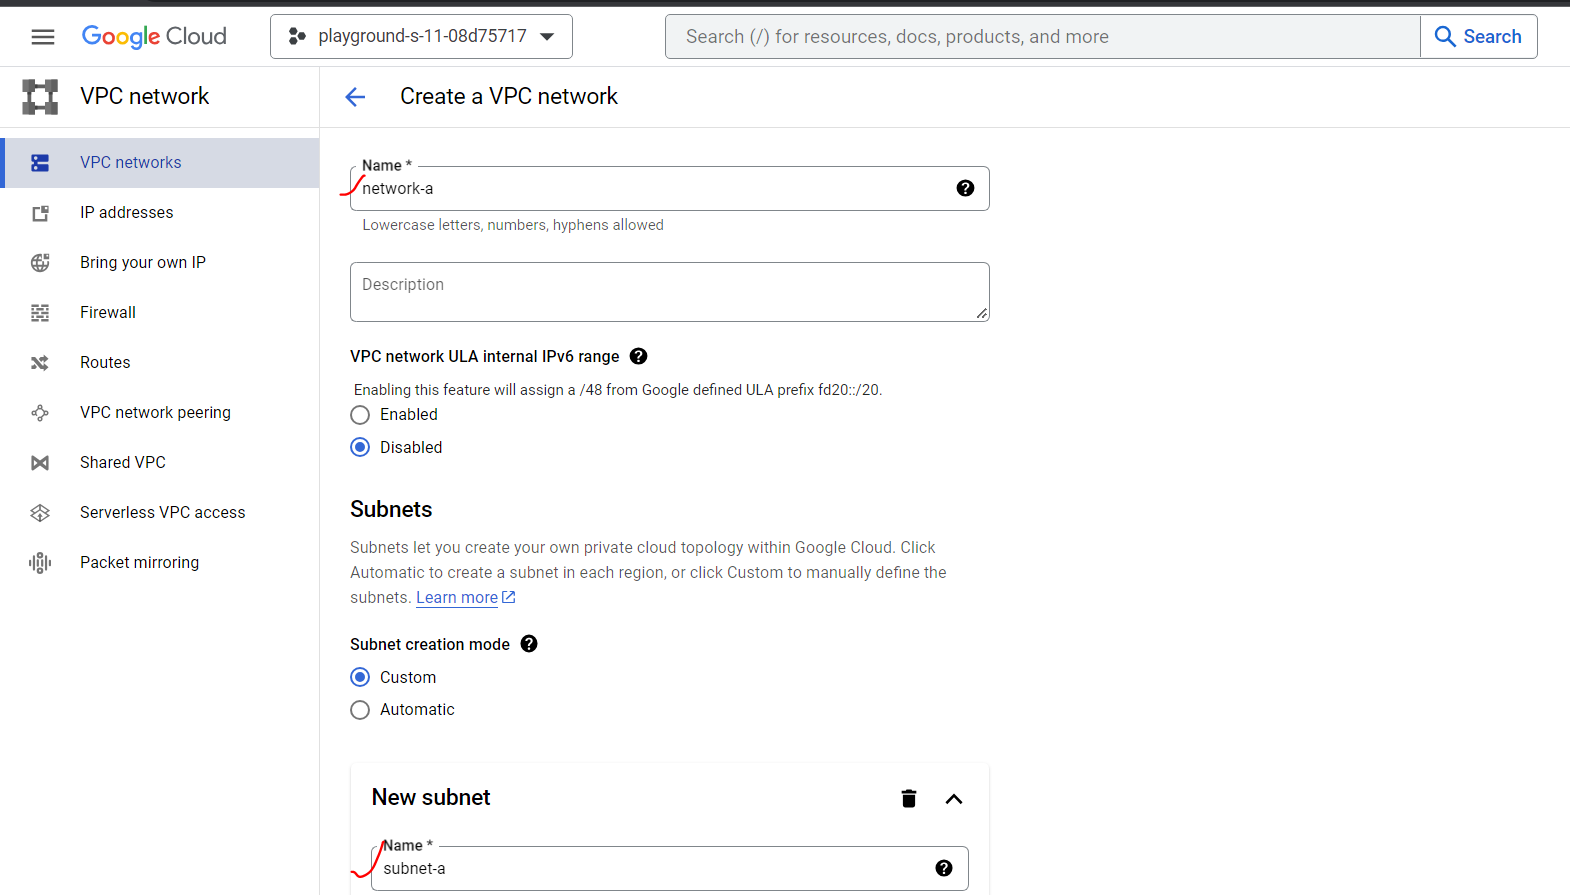
VPC network >> VPC networks >> Create a VPC network.
To establish a VPC network, follow these simple steps:
- Navigate to the “VPC network” section in the Google Cloud Console.
- Click on “VPC networks” to view your existing networks or create a new one.
- Select “Create a VPC network” to start the setup process.
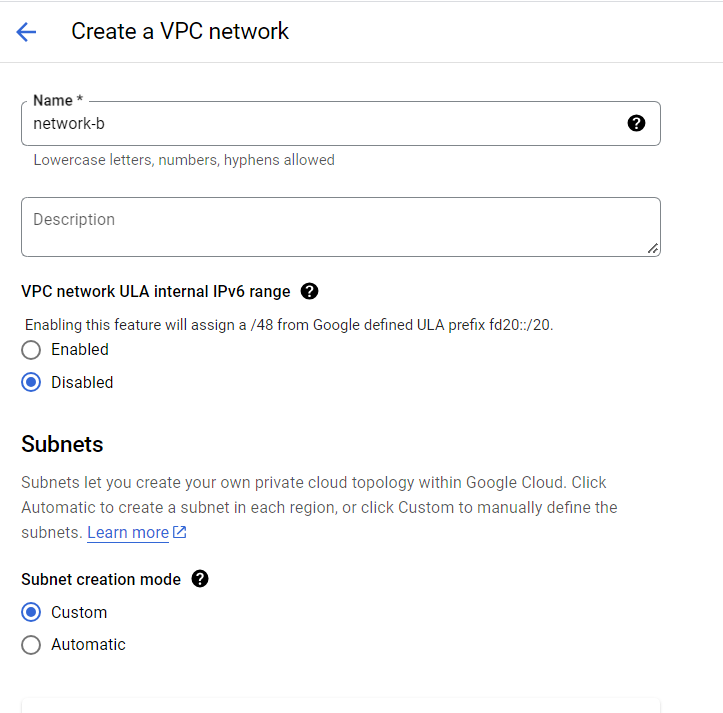
- Enter a unique and descriptive name for your VPC network. This name will help you identify it among other networks.
- Configure the necessary IP address range for your VPC network. Choose an appropriate CIDR (Classless Inter-Domain Routing) block that suits your project’s requirements.
- Customize additional settings, such as subnet creation and routing if needed. These options provide you with granular control over your network.

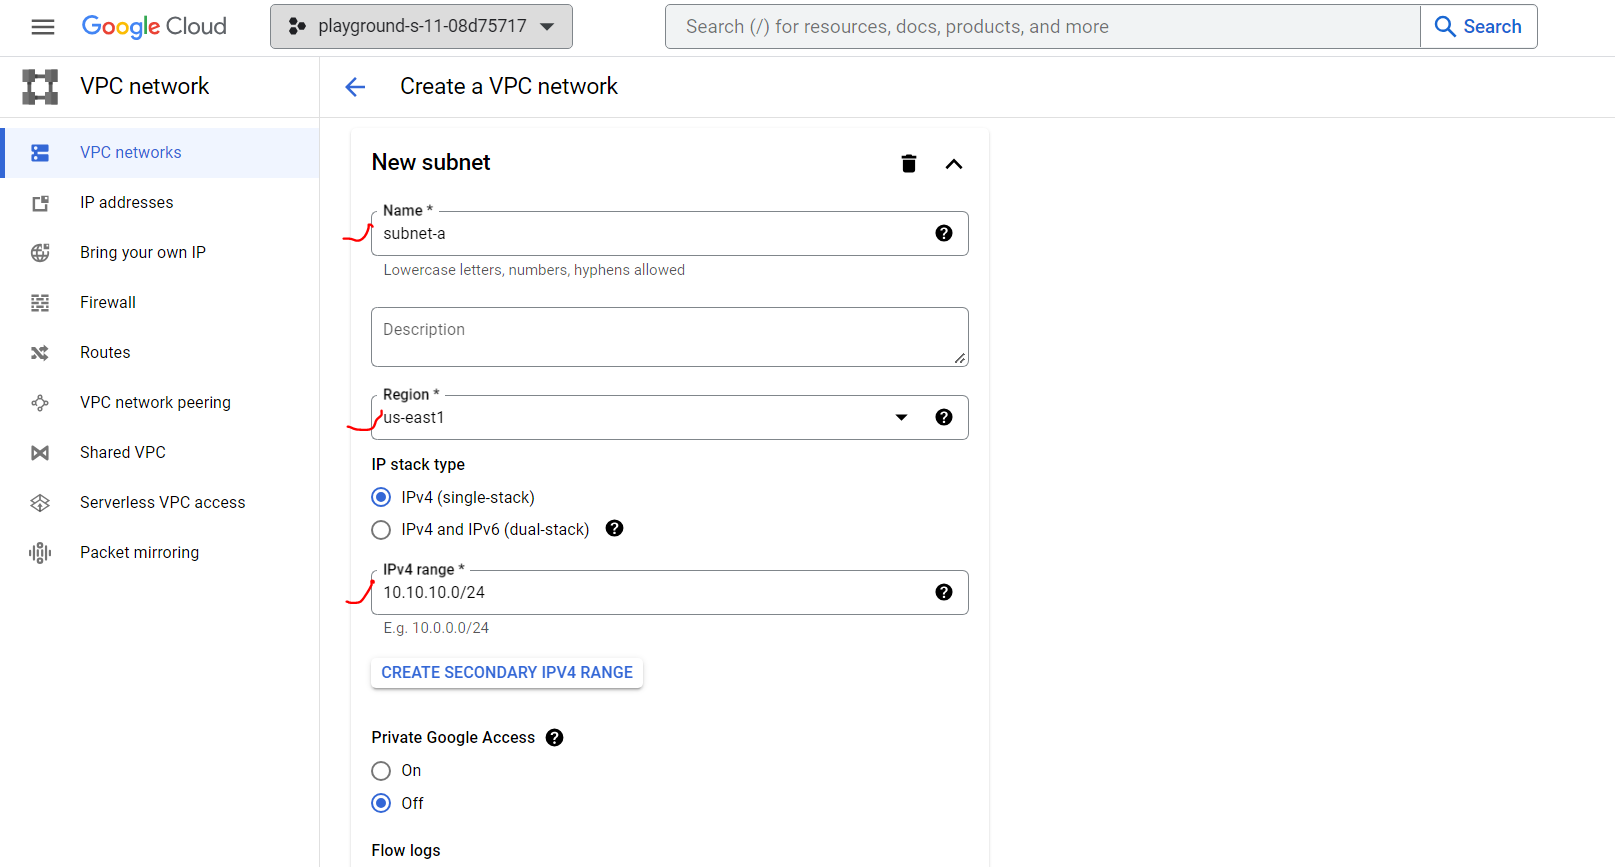
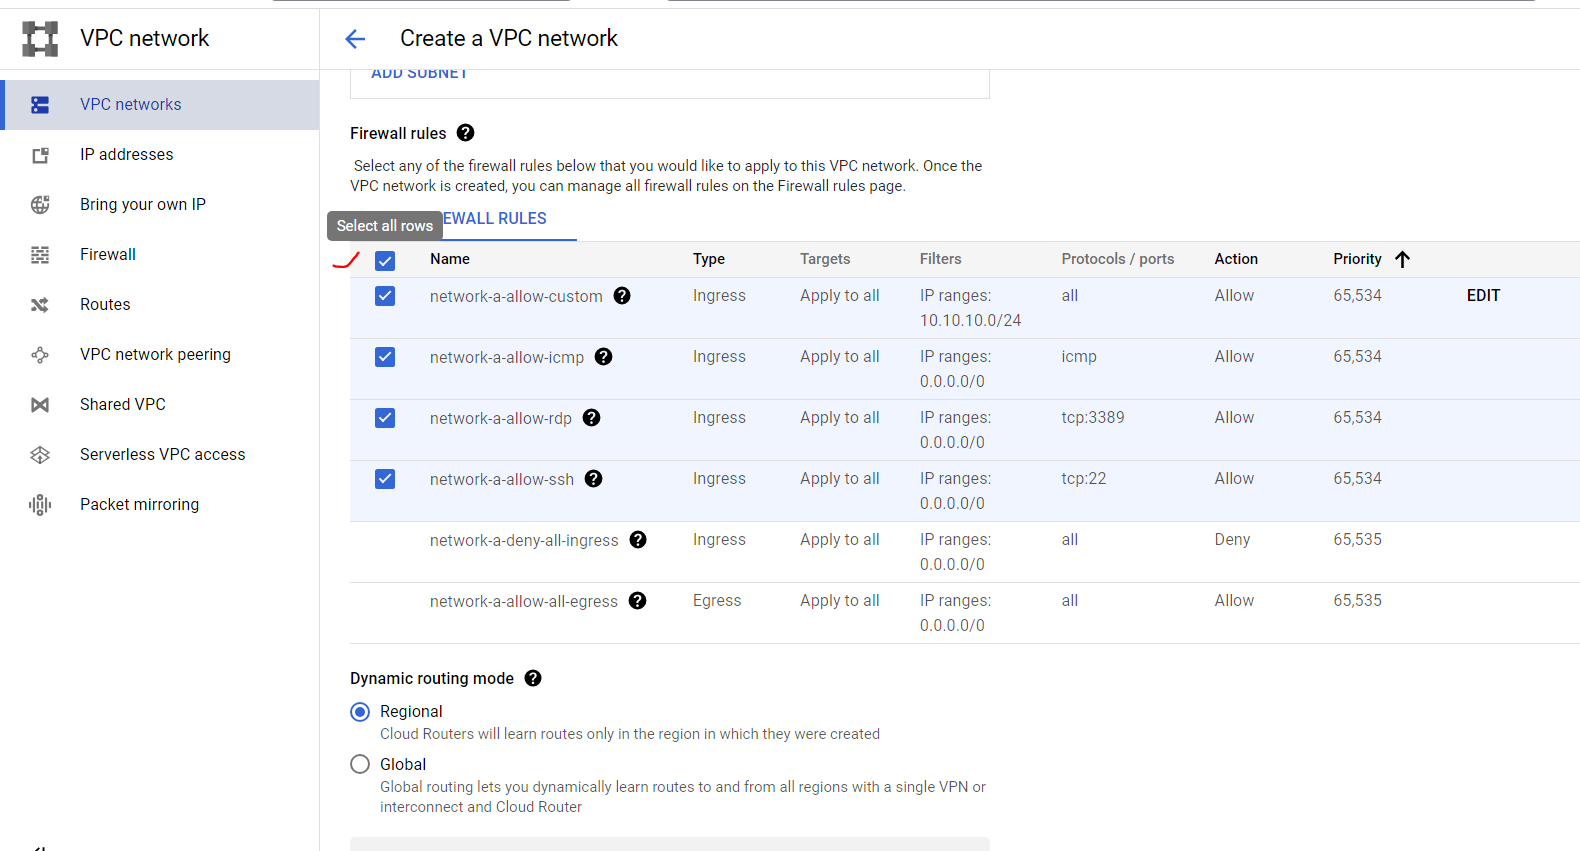
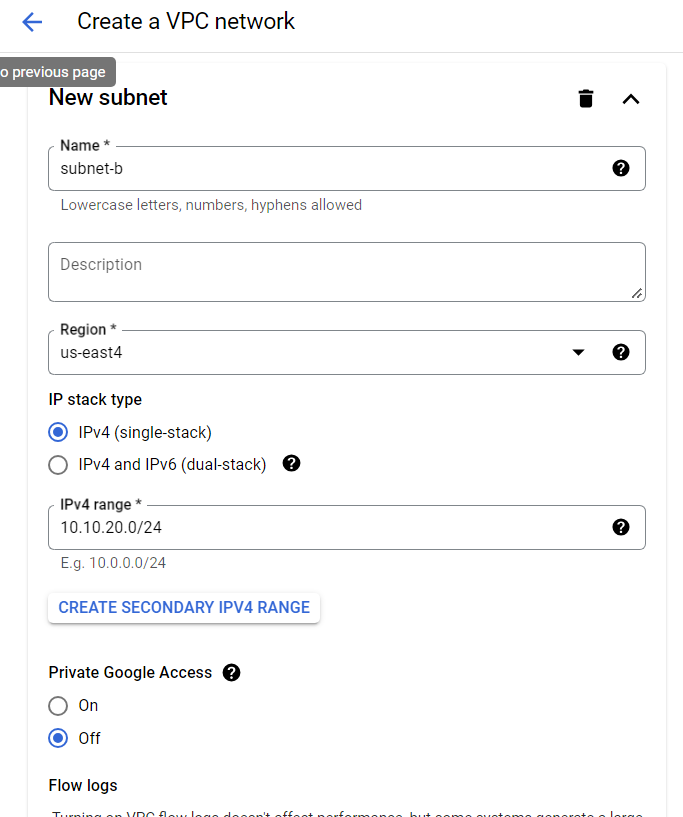
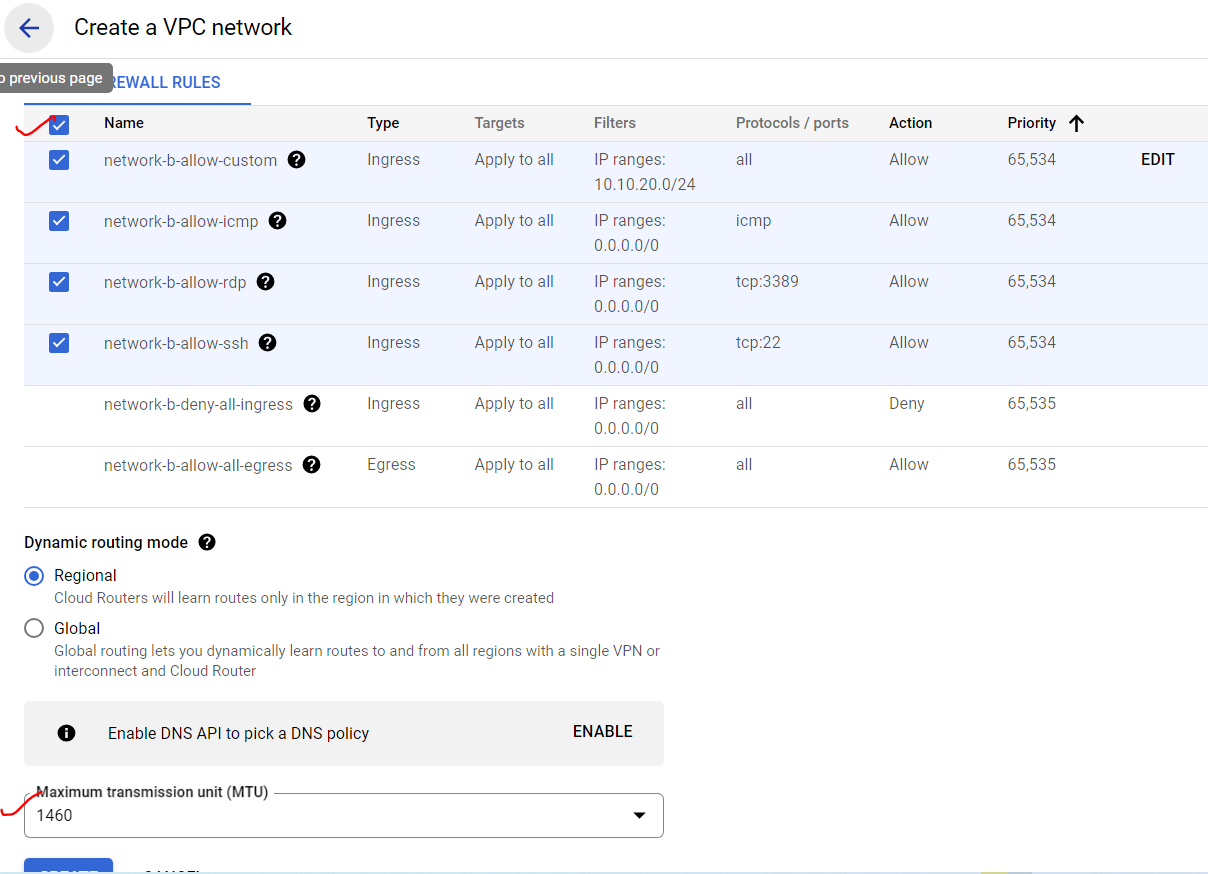
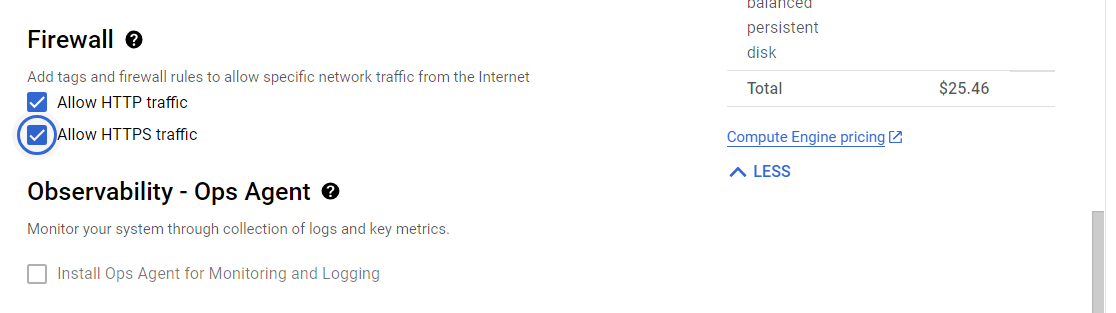
Provide VPC Network name, subnet name, select region (this is important to remember), and provide desired ip block. After that, we are allowing all through firewall for simplicity.
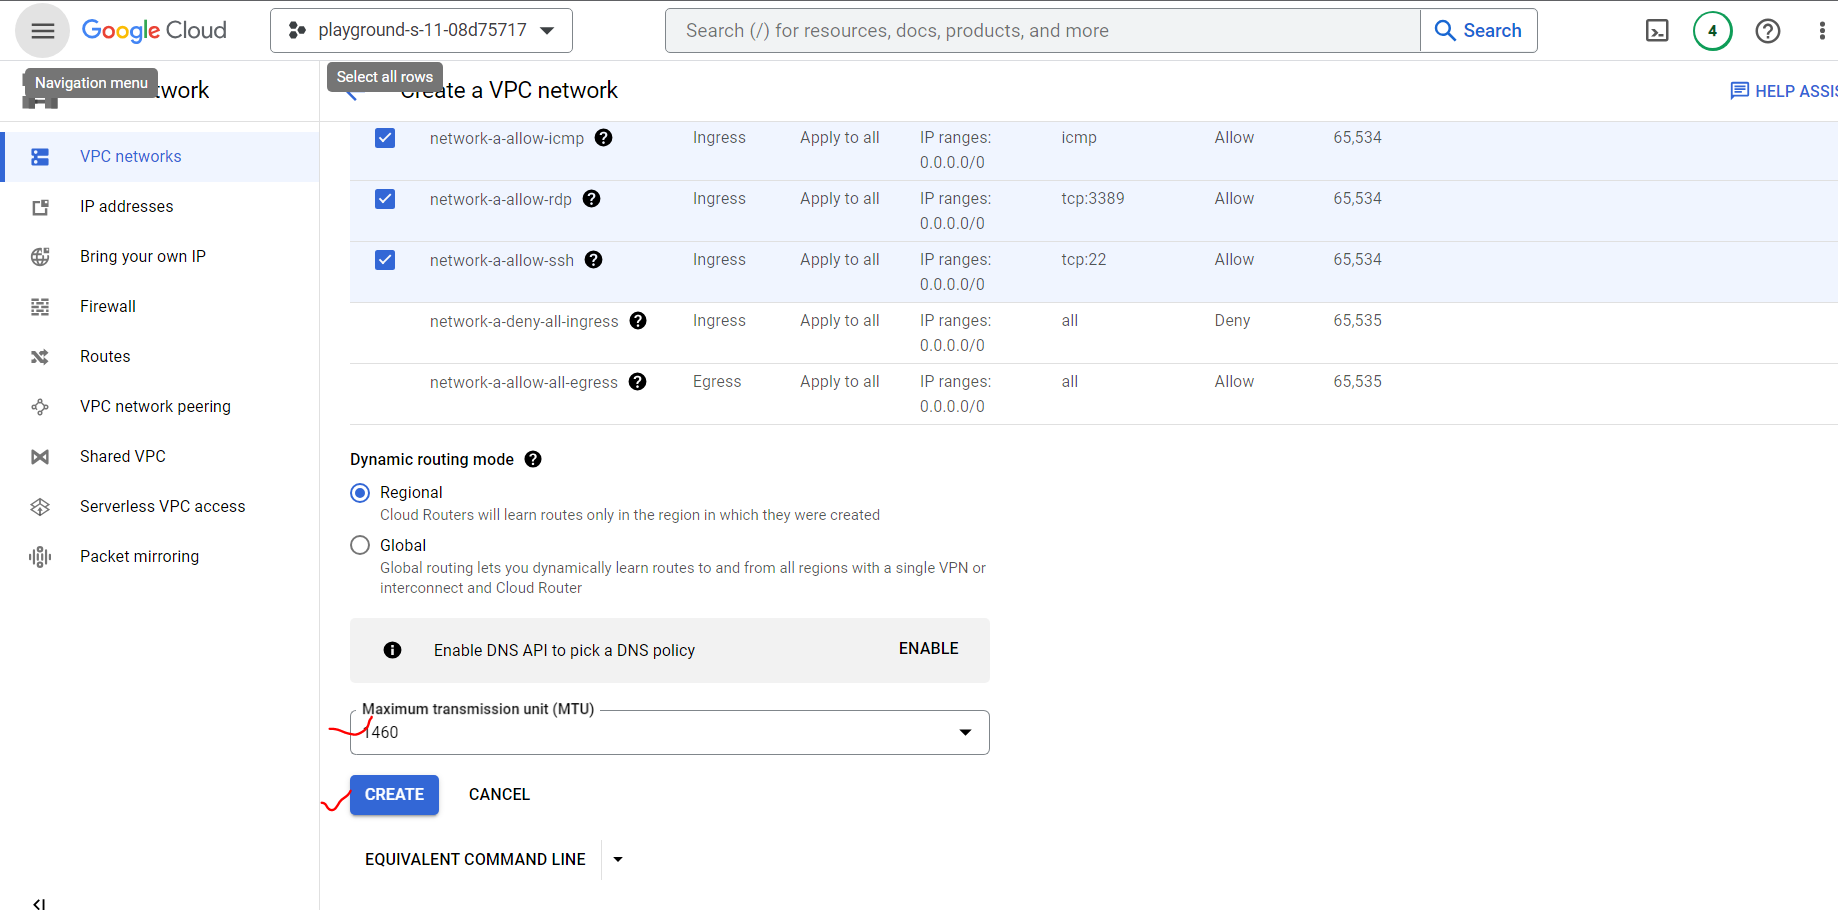
Our VPC network creating is completed. Similarly, we will create another network for VM-2
Remember the region again.
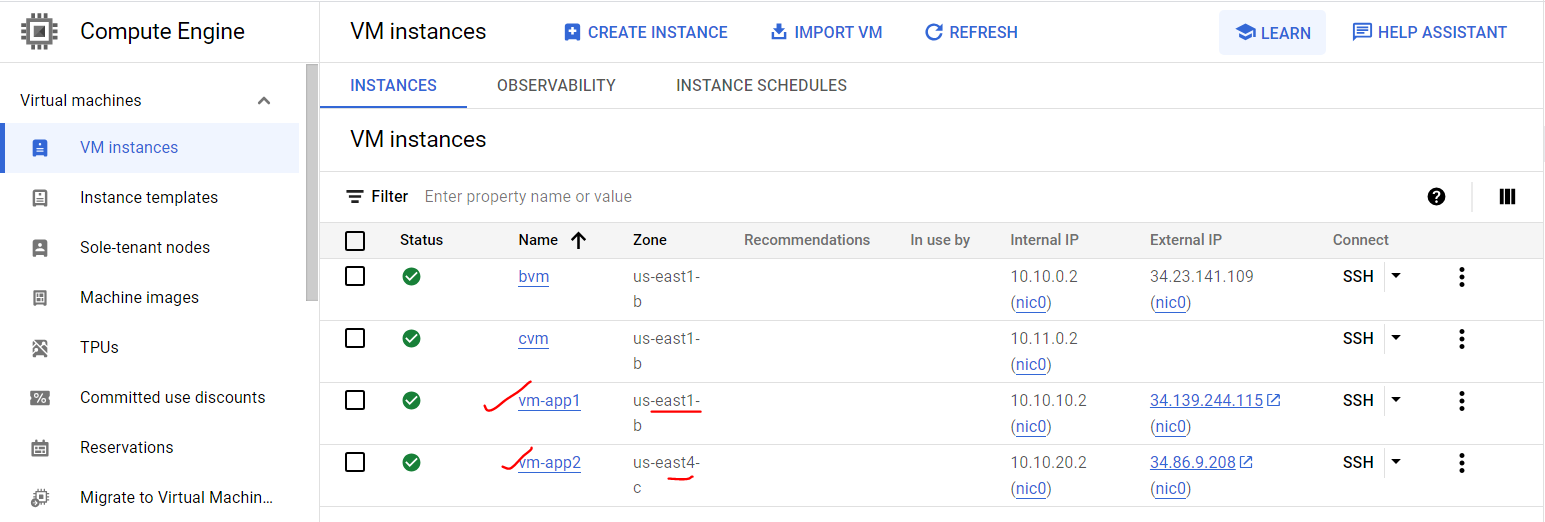
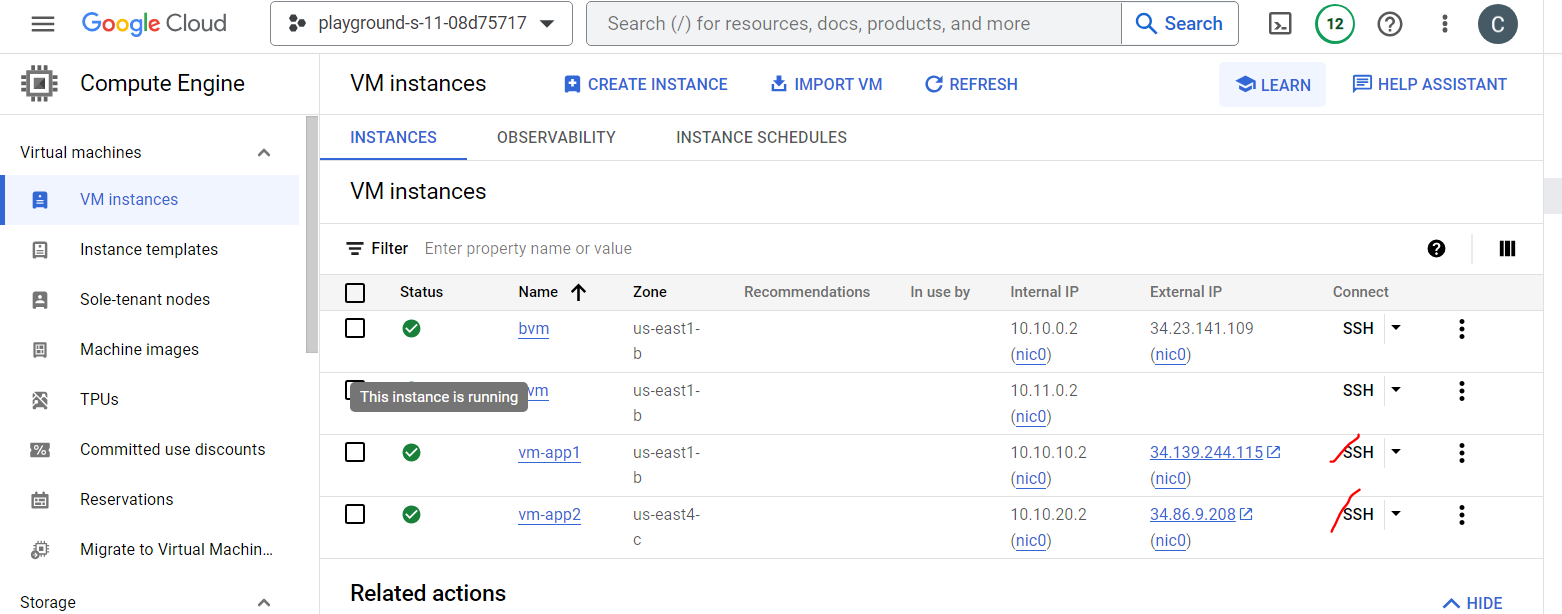
Step 2: Creating VM instance with subnets.
Now we will create virtual machines using our created network block. From left menu bar, we need to do:
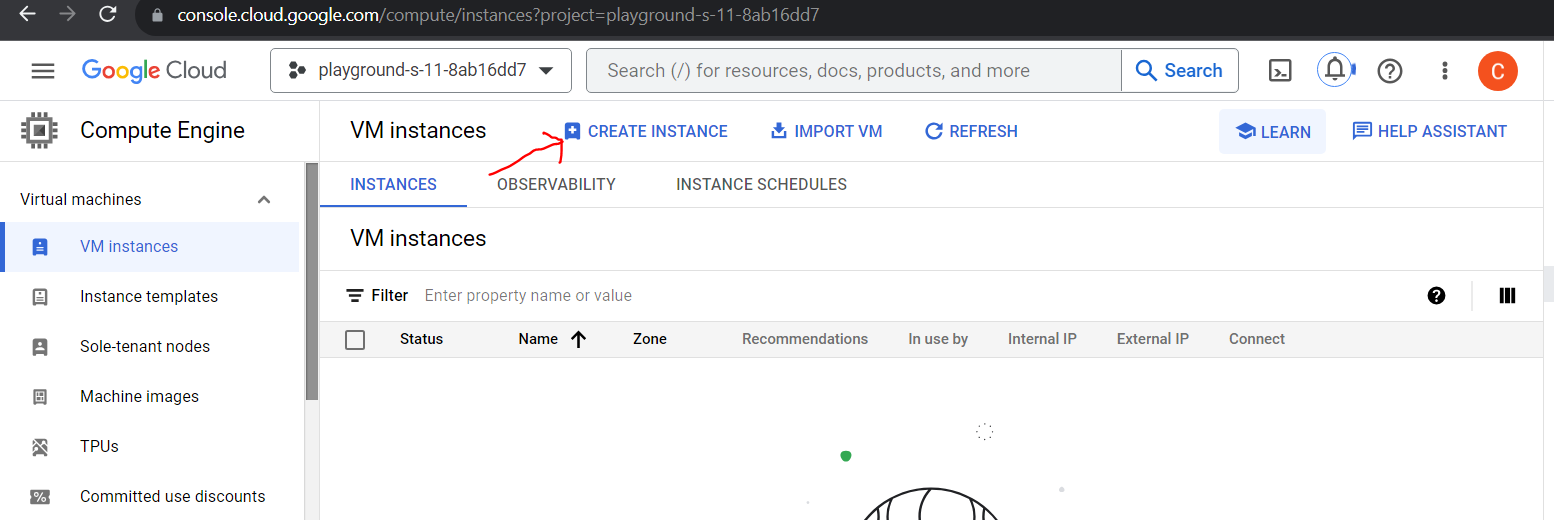
Go to Compute Engine >> VM Instances >> Create Instance.
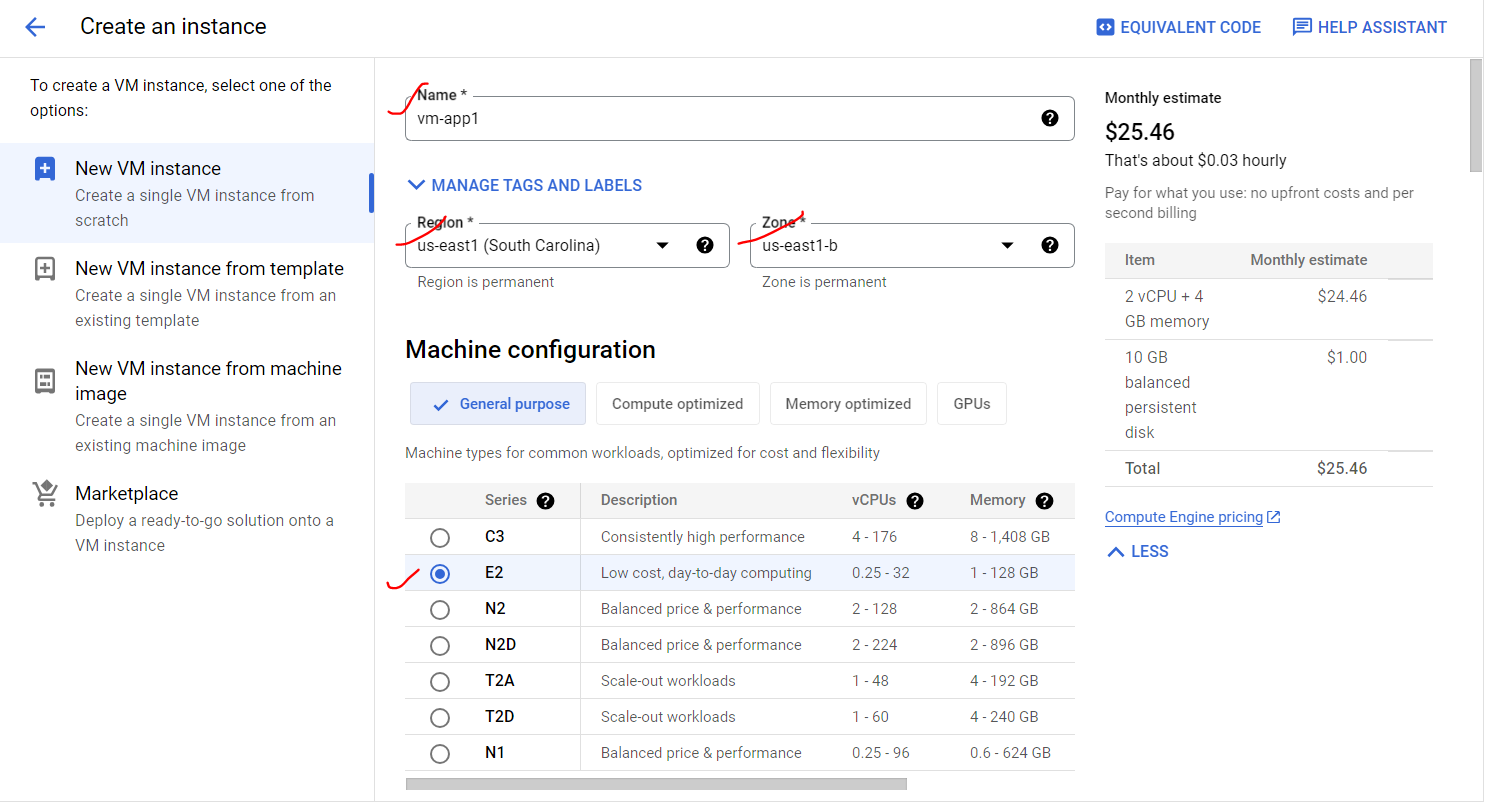
Provide a name for the VM, select the same region where the subnet was created earlier.
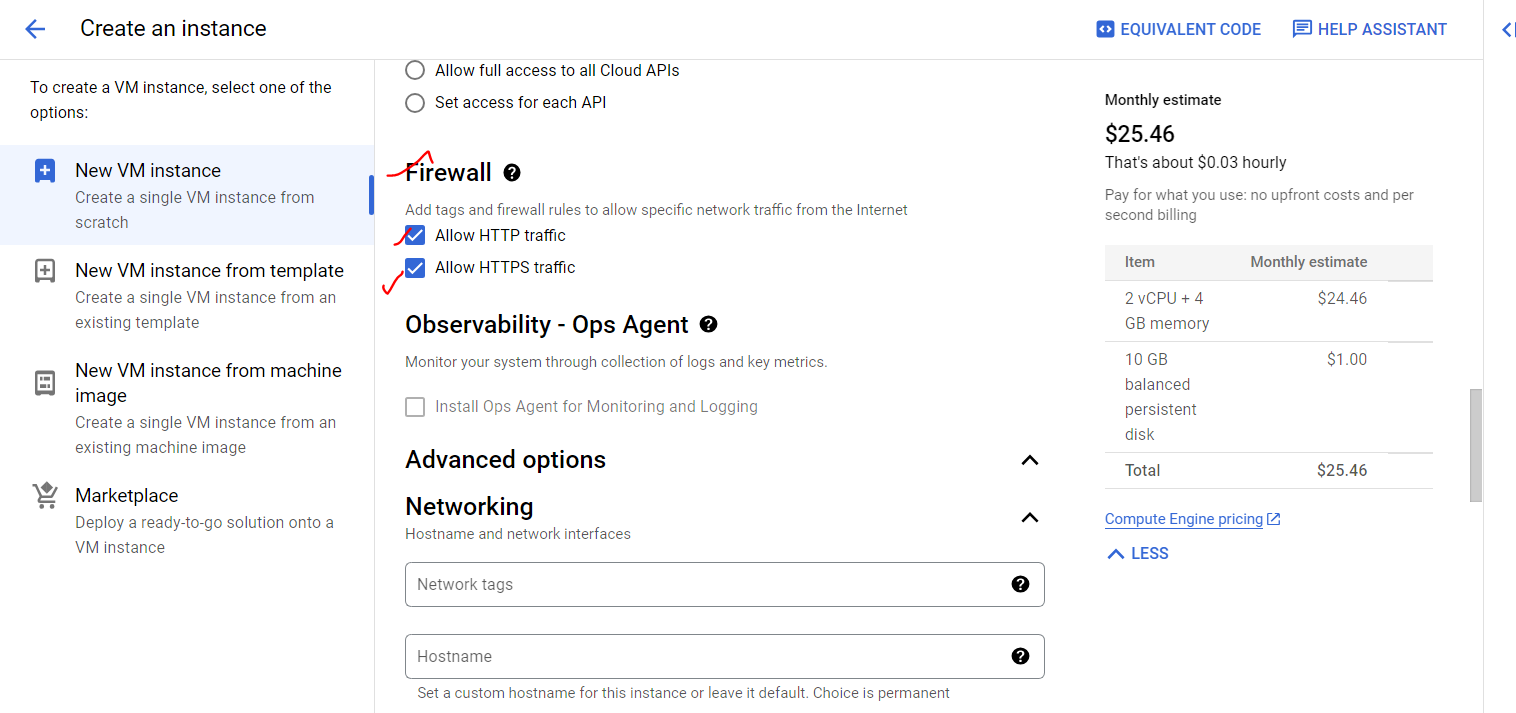
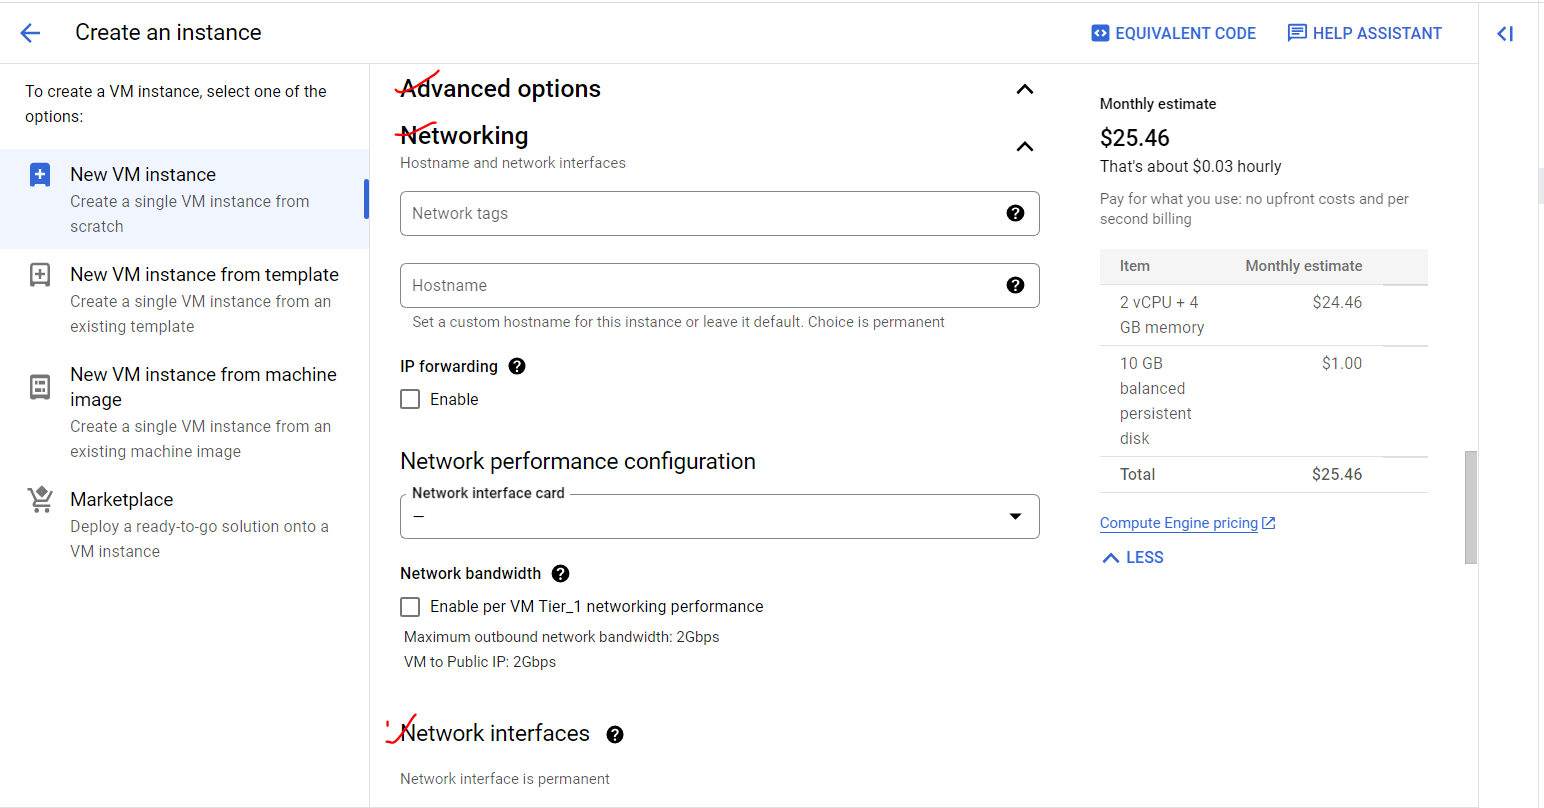
In the networking option, we are selecting network interface and specified subnet.
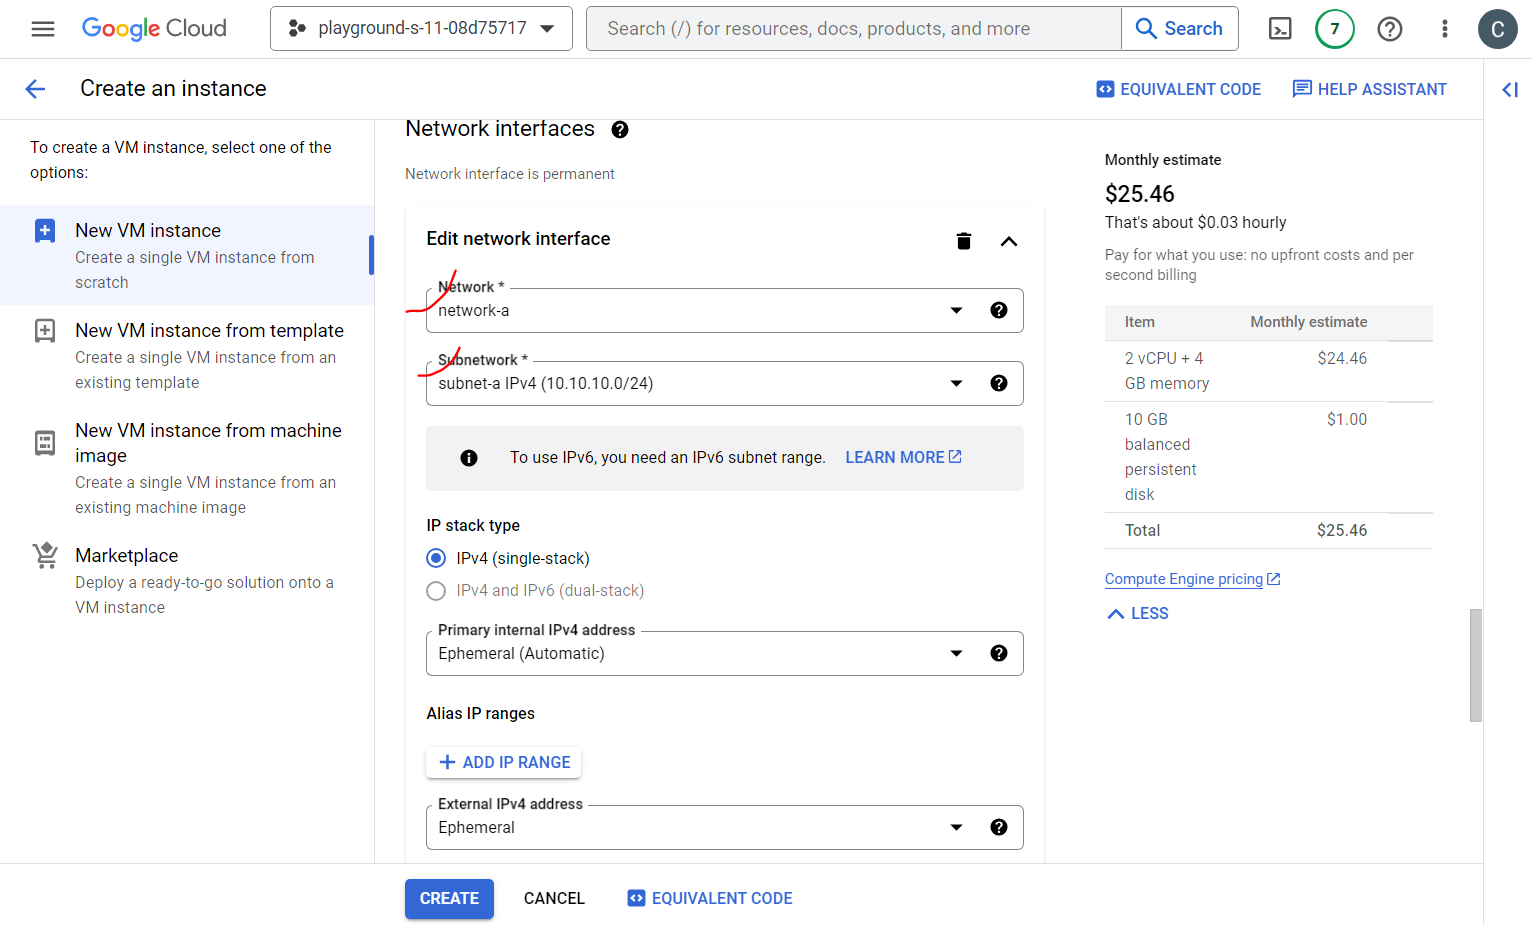
And finally Create.
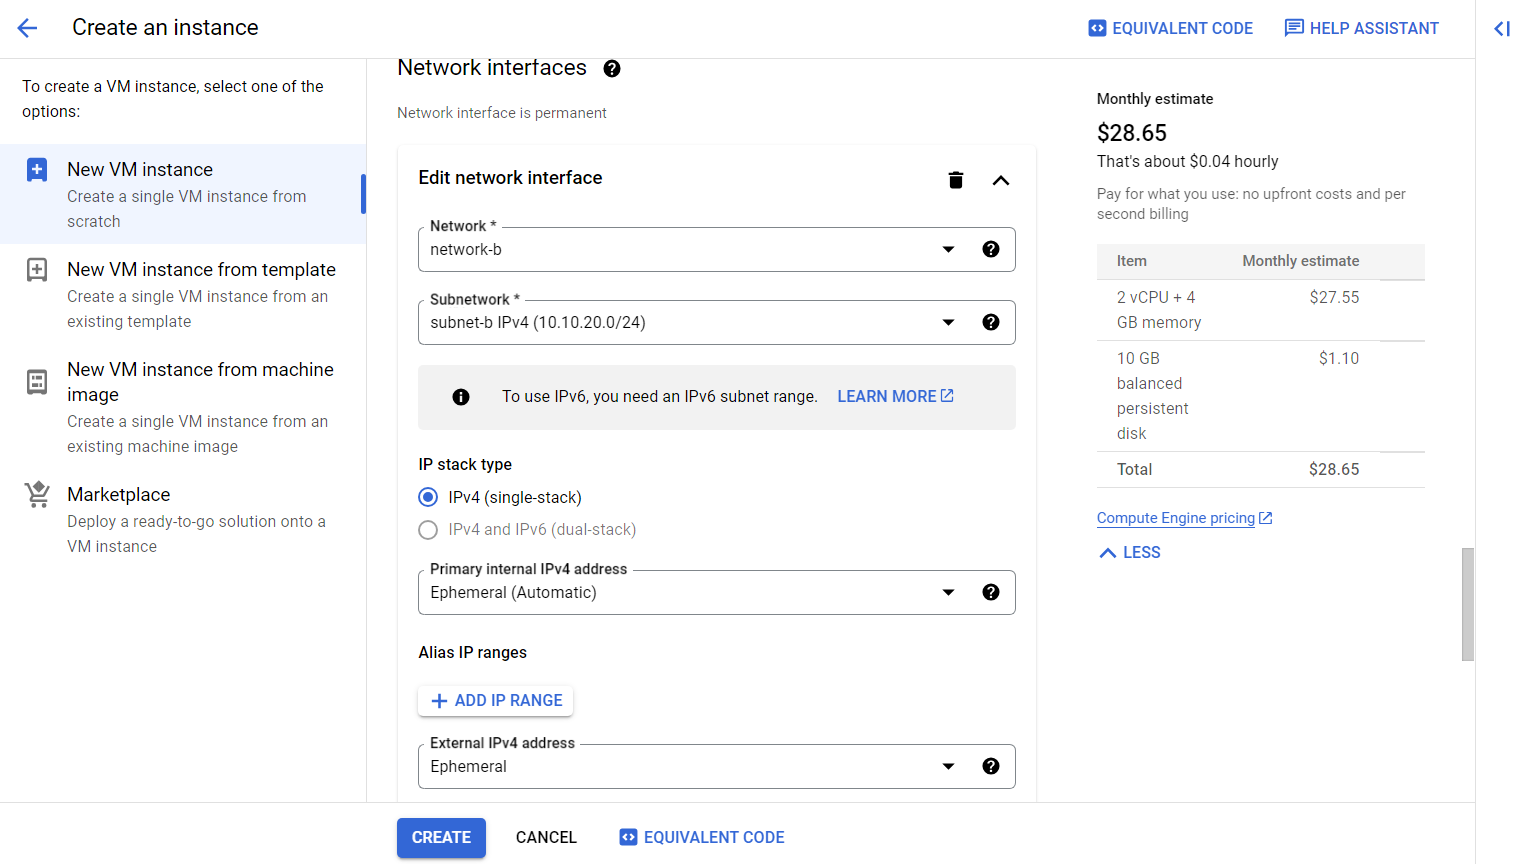
Similarly, we will create VPC-Server2 with second network and its region.

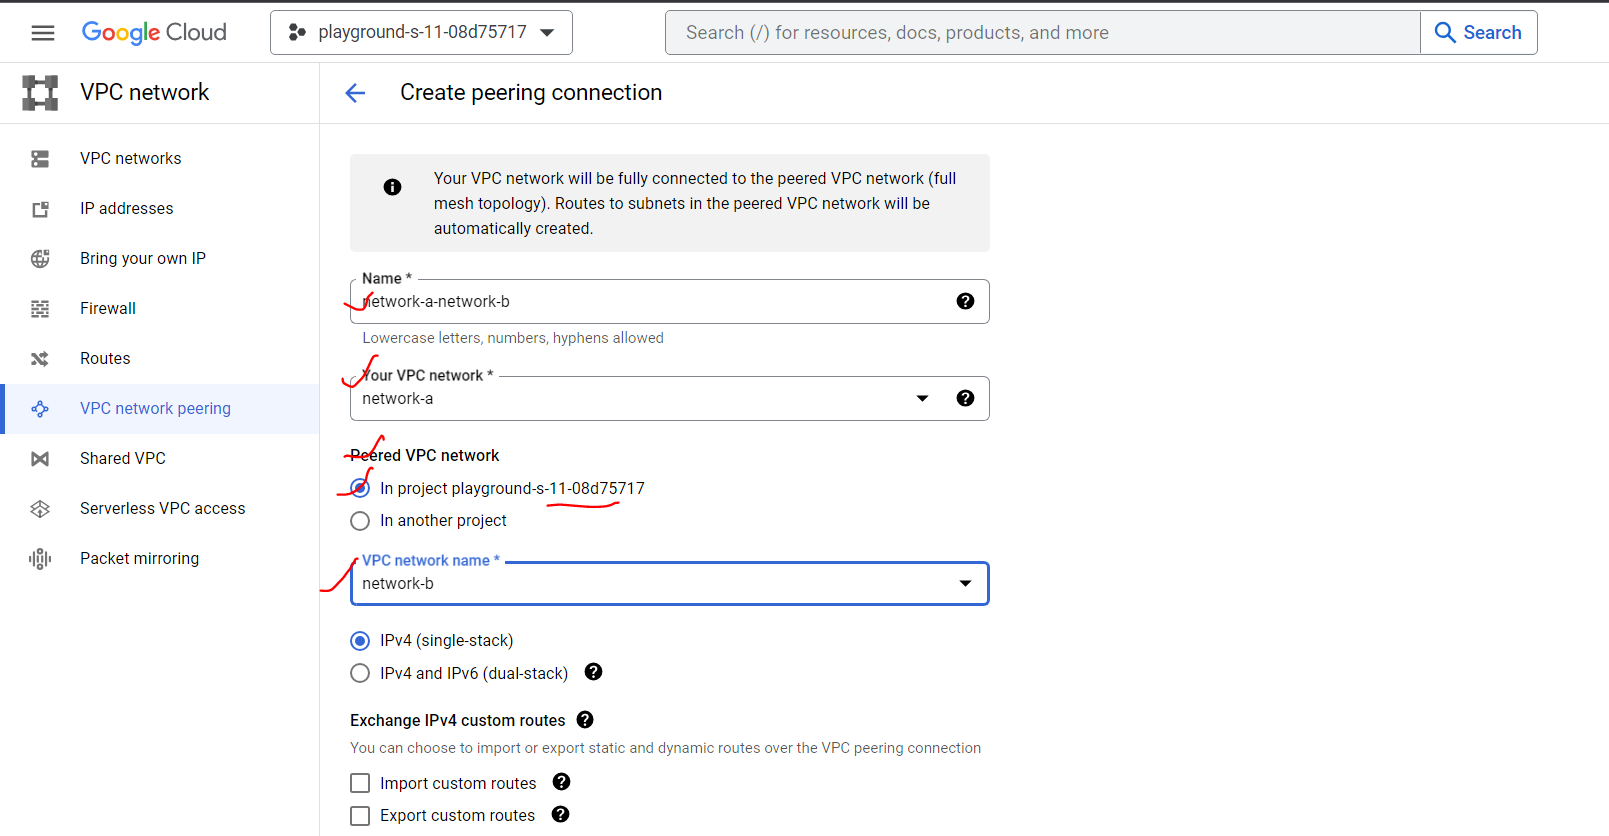
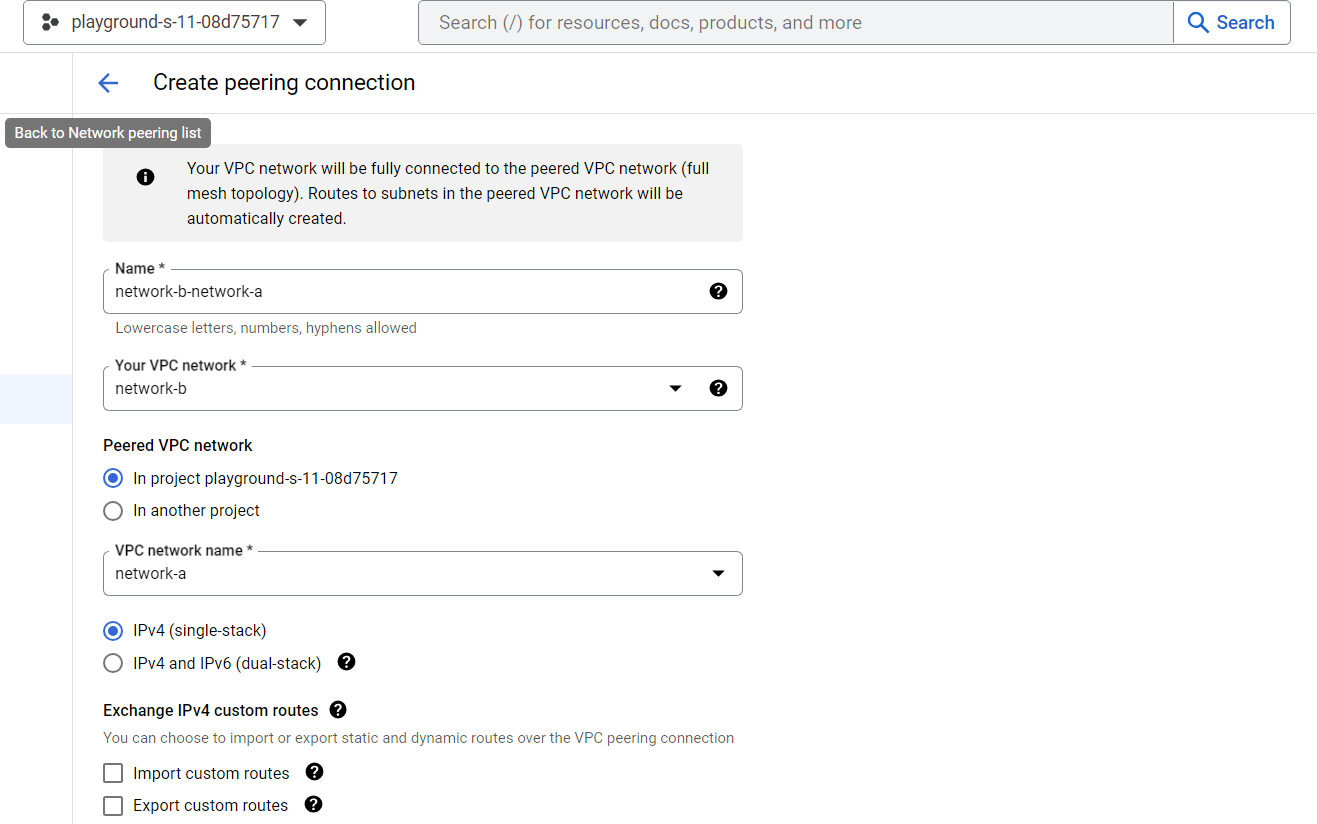
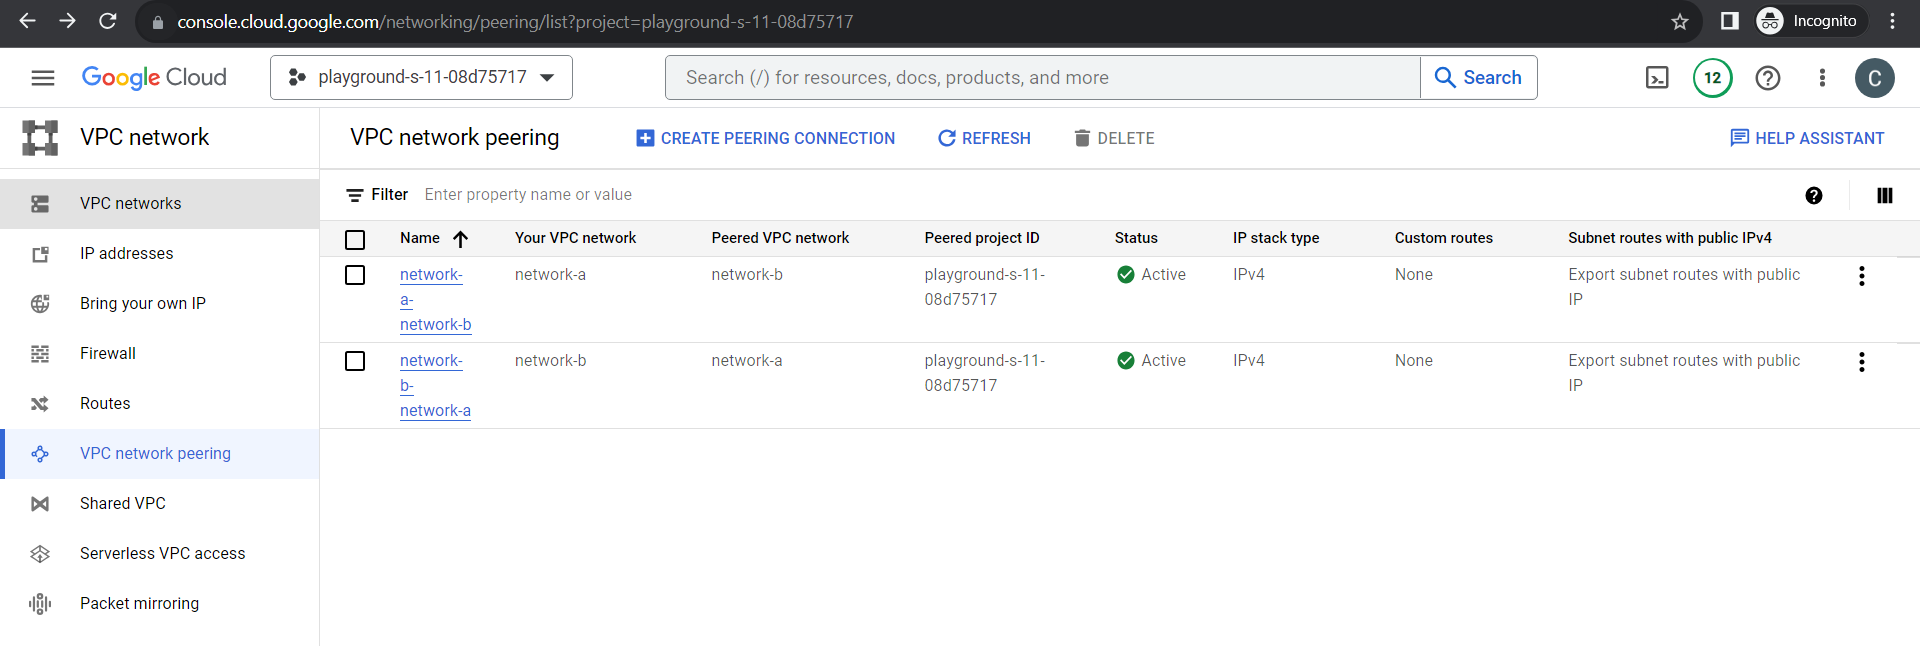
Step3: Create peering connection
Now we need to create two peering connections between networks for establishing communication between one VM to another.
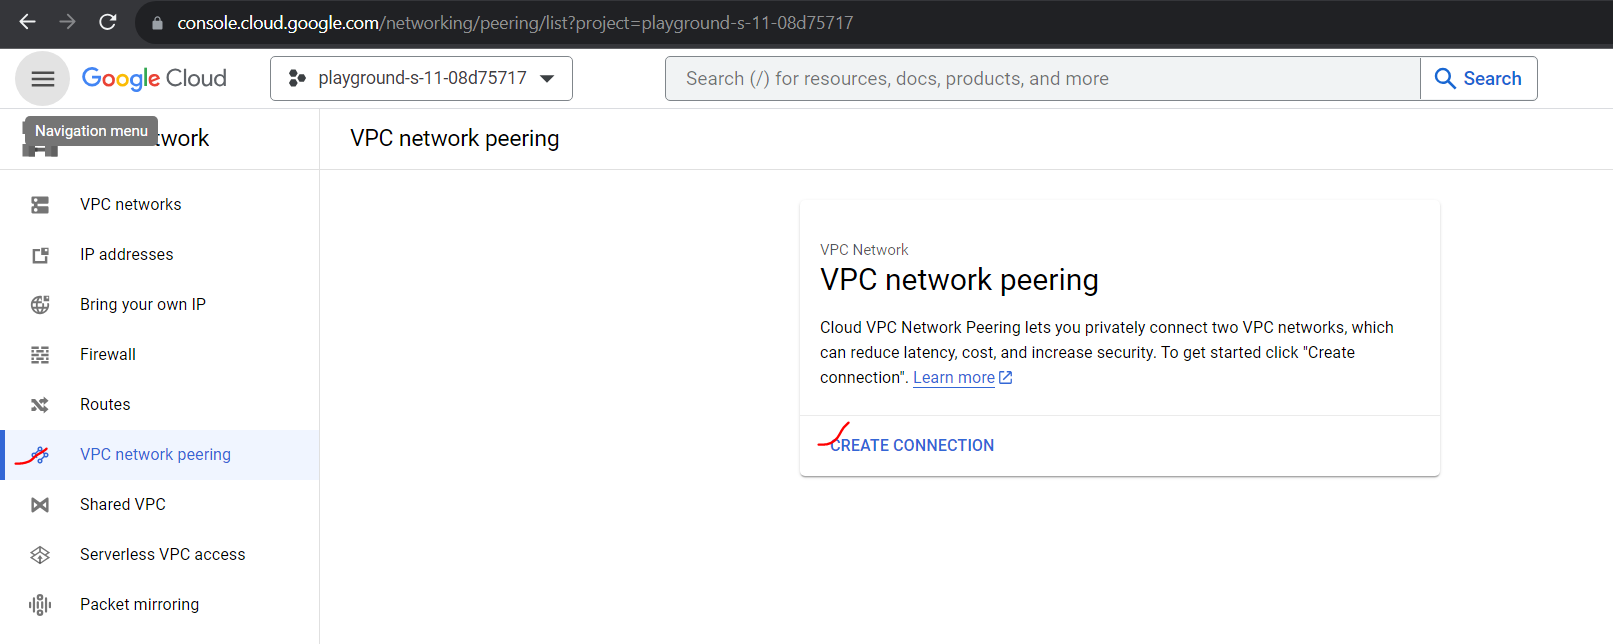
We will need the following info.
The project ID (if you are connecting to a VPC network in another project)
The name of the VPC network you want to peer with
Note: The subnet IP ranges in peered VPC networks cannot overlap.
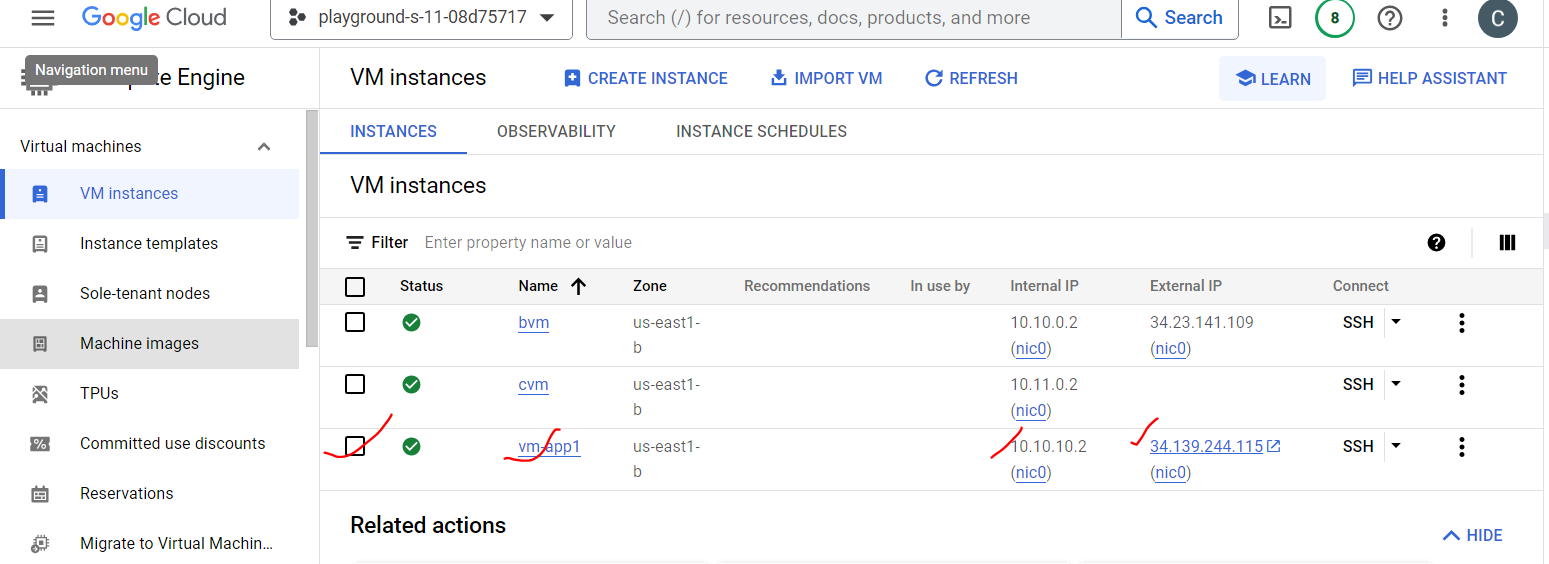
Verification:
Open CLI terminal to each VM by clicking SSH icon.
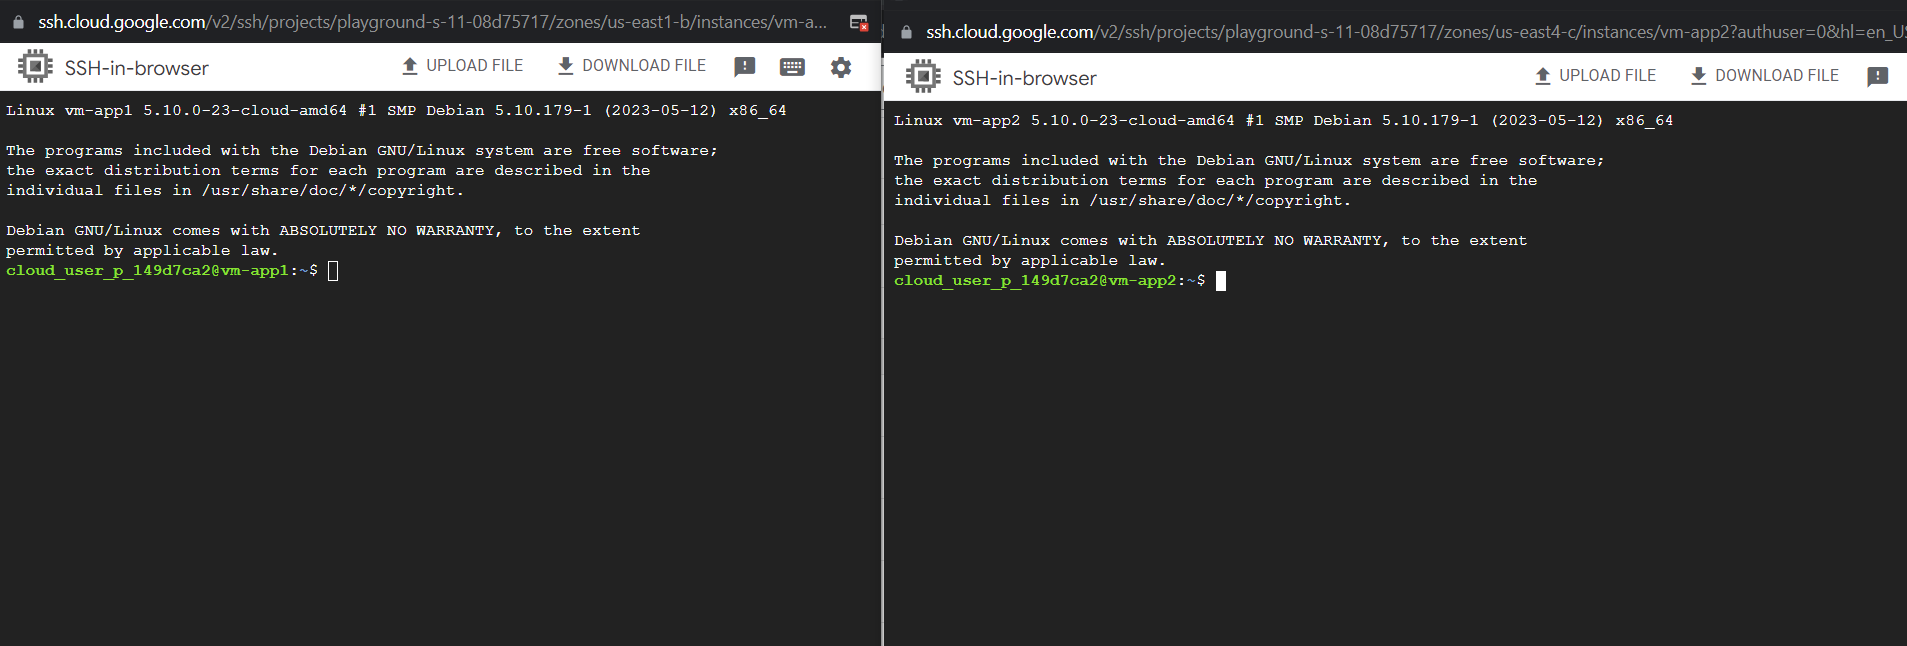
Install necessary modules for checking ping reachability.
Sudo apt-get update
Sudo apt-install net-tools
sudo apt install iputils-ping
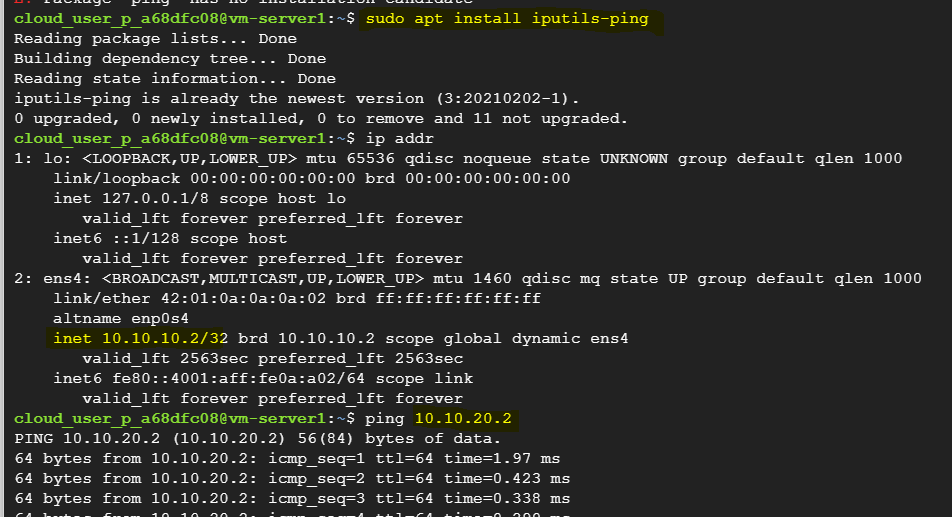
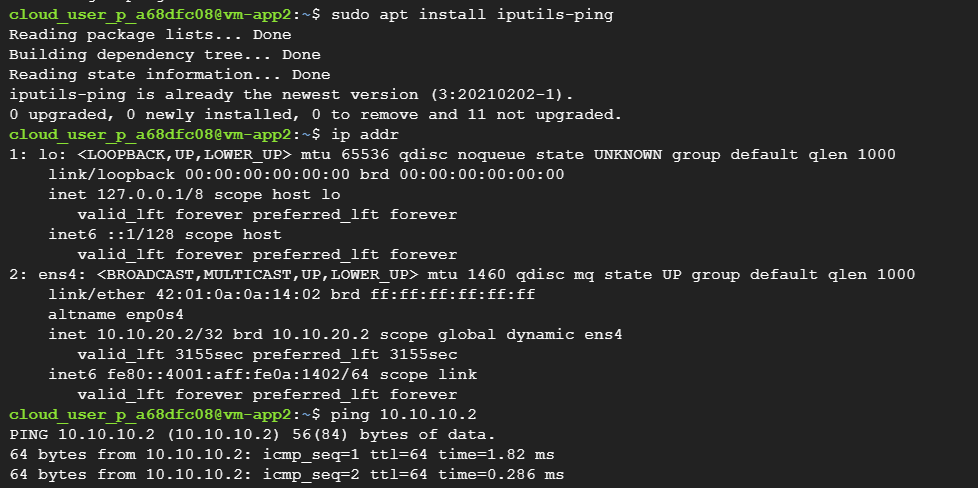
From route table we can also see the table is properly updated.

Create Nginix Server on one VM and access from another
Now we will install nginix on one server and access from another server.
sudo apt update
sudo apt install nginx
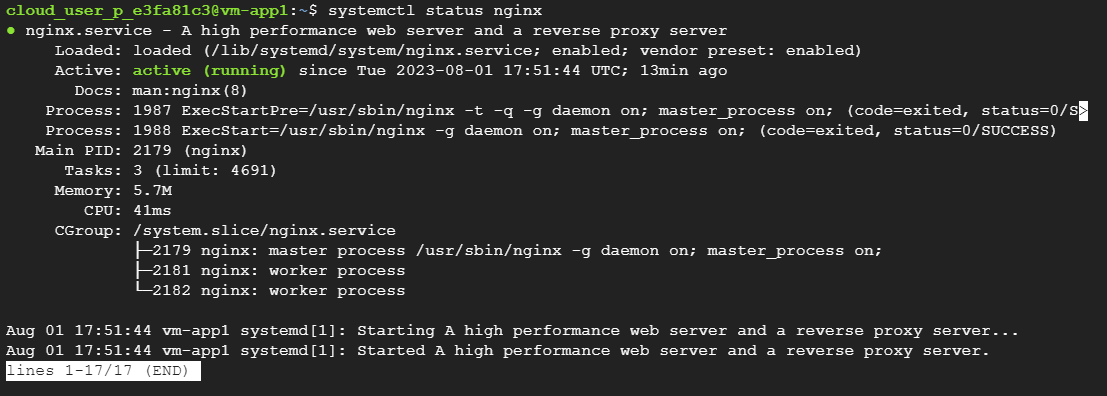
To check service status:
systemctl status nginx
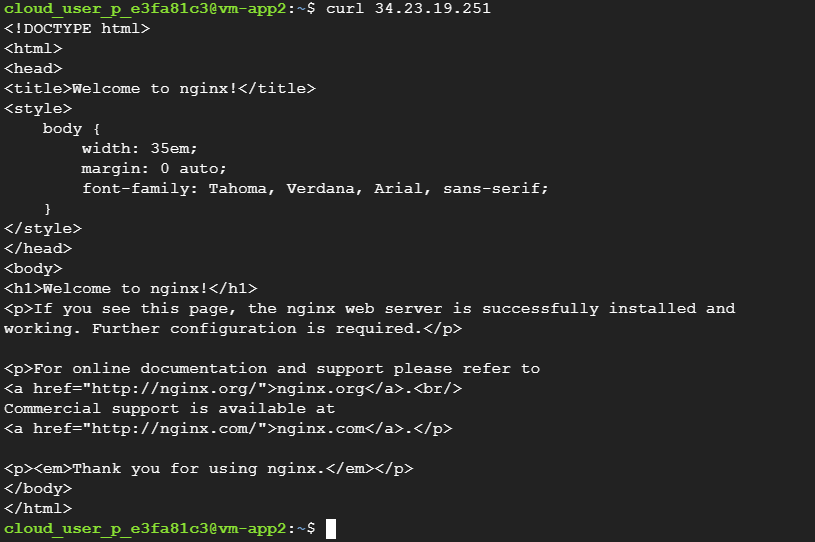
Access from second VM
SSH to VM from local PC using Public IP of VM
SSH public-private key pairs are used for secure authentication between a client and a server. The client generates a pair of keys: a private key (kept secret) and a public key (shared with servers). When the client tries to connect to a server, it sends its public key. The server checks if it matches any key in its authorized list. If so, the server encrypts a message with the public key, the client decrypts it with the private key, and access is granted. This provides a more secure alternative to password-based authentication.
We will first create a public-private key pair in our windows laptop by opening PowerShell CLI.
ssh-keygen -t rsa
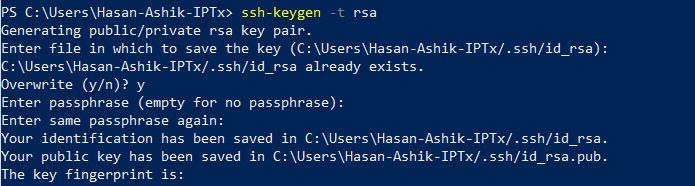
This will create a private and public key pair in specified location.
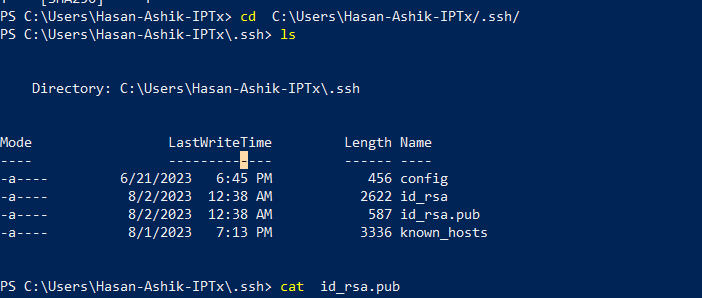
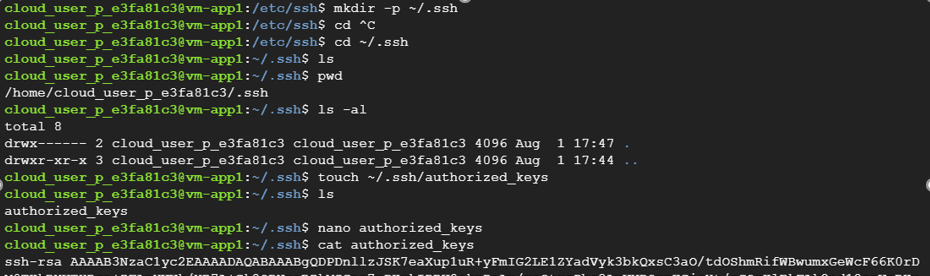
Now we will change directory to ssh key generation location and copy the public key. Now we will create a directory in the VM as ~/.ssh and create a file named authorized_keys. We will paste the public key in the file.
|
1 2 |
cloud_user_p_e3fa81c3@vm-app1:/etc/ssh$ mkdir -p ~/.ssh cloud_user_p_e3fa81c3@vm-app1:/etc/ssh$ cd ~/.ssh |
pwd will show us the current directory.
/home/cloud_user_p_e3fa81c3/.ssh
Now let us create a file for storing the key.
|
1 2 3 4 5 |
cloud_user_p_e3fa81c3@vm-app1:~/.ssh$ touch ~/.ssh/authorized_keys cloud_user_p_e3fa81c3@vm-app1:~/.ssh$ ls authorized_keys cloud_user_p_e3fa81c3@vm-app1:~/.ssh$ nano authorized_keys cloud_user_p_e3fa81c3@vm-app1:~/.ssh$ cat authorized_keys |
ssh-rsa AAAAB3NzaC1yc2EAAAADAQABAAABgQDPDnllzJSK7eaXup1uR+yFmIG2LE1ZYadVyk3bkQxsC3aO/…………………………………SP745
Now access the server from PowerShell cli.
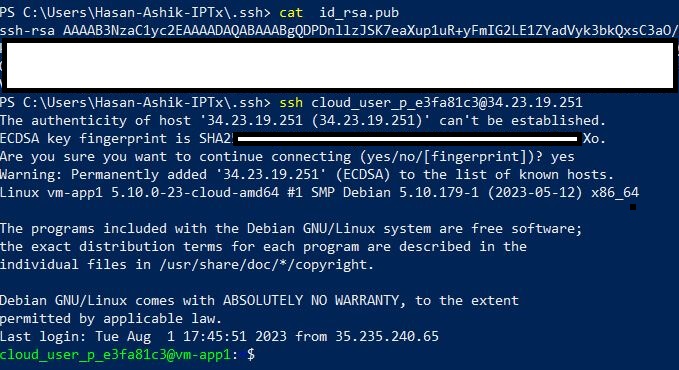
We are now connected to the VM server.


0 Comments